As I mentioned earlier, Christmas is coming up. Many persons look forward to the gift giving and receiving. Some of us get lost in this anticipation and we misplace many items, small or large- much of it ends up stolen. In this blog I'll show you how to celebrate the season without misplacing your flash drive or allowing it to be stolen.
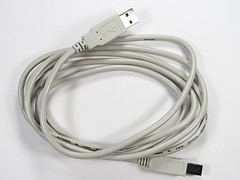
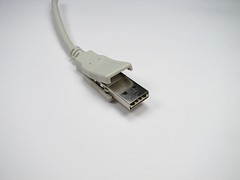
Firstly, nobody wants a cut-off USB cord therefore the chances of it being stolen is slim to none. So, we'll make a USB flash drive which will give anyone the impression it is a useless torn USB cable.
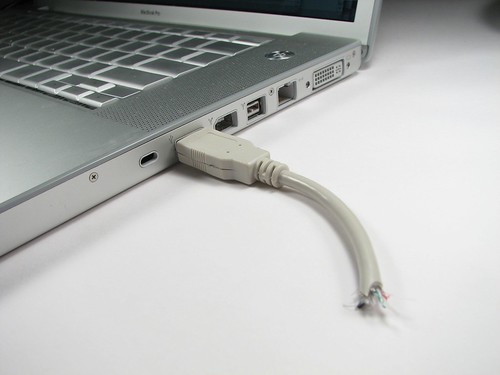
OH NO! a torn USB cable!!! *screams!!*
Calm down Frantic Sally!
It's a working USB......flash drive.
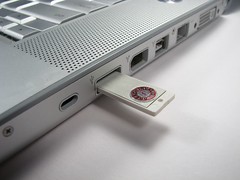
It’s no secret that there are a lot of strange USB devices out there, particularly flash drives. Not a comprehensive list, but we’ve sure seen Lego, twigs, action figures, bowling balls, sushi, anatomical parts, pigs, transparent drives, erasers, cassette tapes, just about any design you can imagine.
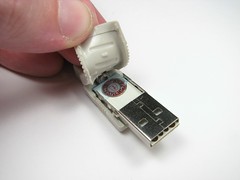
Despite all that, the picture above is a little surprising– because yes, it’s a working USB flash drive. Here, is the step by step walk through of how to make your own.
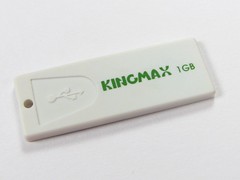
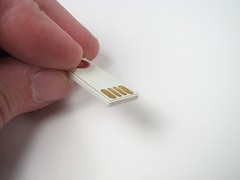
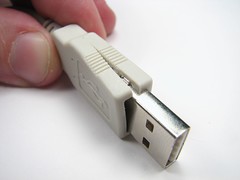
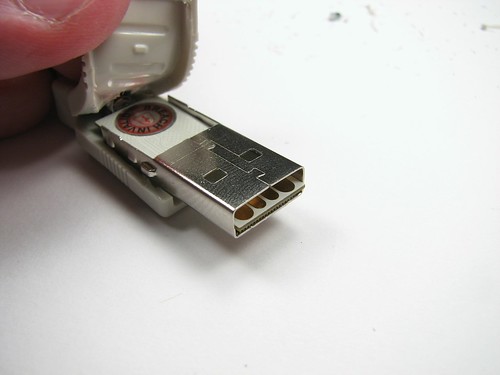
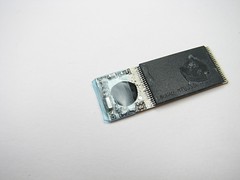
This is a KingMax 1 GB USB flash drive, one of the smaller varieties out there. It's available on eBay for about $10 (USD). Above, you can see it. The gold pads are just printed pads on a tiny circuit board.
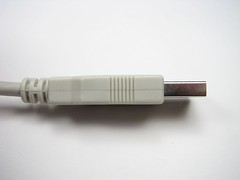
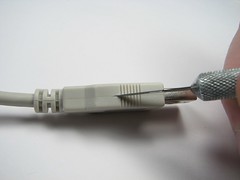
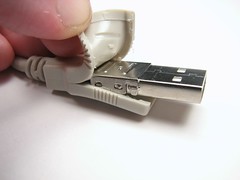
Using a sharp hobby knife, cut neatly along that seam. Cutting there actually provides some camouflage for you: Since you expect there to be a seam there, it’s very hard to notice an additional cut as well. If you really want your seams to be invisible, you might want to use a black USB cable.
Cut deeply enough that you actually cut through to the metal shell underneath the rubber, at which point you can start to peel back the rubber parts.


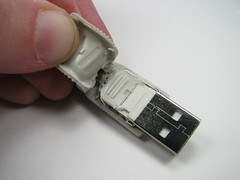
The metal shell underneath the rubber overmolding consists of two of
pieces of thin steel that are stamped and folded into place. They are
held together by some tabs and slots– use a small screwdriver to defeat
the tabs and you can pull the flap the “lid” piece, so that you can now
get at the inside of the metal shell.

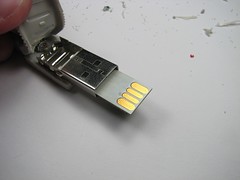
With the one piece of the metal shell removed, you have access to the
middle parts of the shell where the original USB wires and plastic and
metal connections are located. Cut them away with your choice of tools. I
found that the hobby knife worked well enough to sever the wires, at
which point the remaining plastic parts could be removed pretty easily.
What’s left is just the metal shell– ready for you to put your own circuit
board in.
One other final detail to take care of: The back side, where the circuit
board will be resting, has some metal parts that the back side of the
circuit board will be touching– so you need an insulator there. If you have a piece of clear blue heat-shrink tubing, that might fit well,
but a piece of electrical tape would do the job too. Once that is added everything should look safe and still fit together.
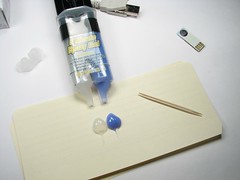
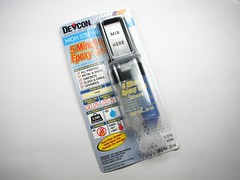

To bond everything together and fill all the extra space inside the USB
cable end, use gel-style 5 minute epoxy. Fortunately, five minutes
gives you enough time to apply the glue, place the flash drive in place,
and put the rubber molded housing back on, Uhu glue has a much quicker drying time and is not recommended if you are not quick. Hold the connector firmly–
paying attention to the seams for alignment– until the epoxy cures,
about five more minutes.
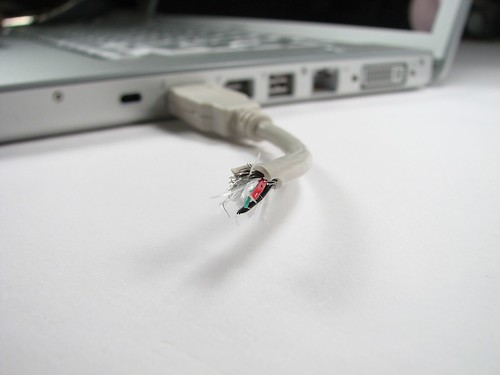
Last step: Cut the cable as desired. A jagged cut looks different than a clean cut– take your pick.
Voila!
Happy Building :-)
Made Possible By:
evilmadscientist.com
WOW!!!! This is such GREAT decoy, this week i lost my flash drive with all my work and up till now I'm still broken hearted about it, But thanks to you now I know what will give for next semester, I AM SO GOING TO TRY THIS YAHHHH!!!!!!!!!!! #SO #HAPPY #:D
ReplyDelete